Some of the links in this post might be affiliate links. This means that if you click on the link and make a purchase, I’ll receive a small commission – at no extra cost for you, which helps me cover the costs for this blog
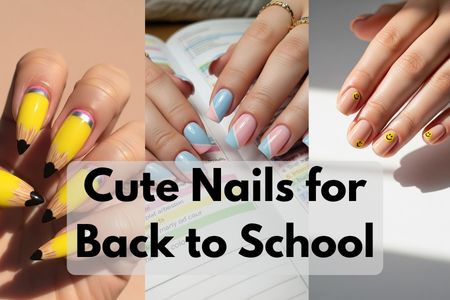
Back to school season is the perfect time to refresh your look and your nails deserve the spotlight too! Whether you’re returning to campus or logging into virtual classes, a fresh mani can boost confidence and showcase your personal style. These cute nails are designed to follow school rules while still keeping things trendy and fun. From subtle patterns to playful pops of color, these back to school nail designs are low-maintenance, wearable, and full of personality. Scroll down for 15 class-ready looks you can easily DIY at home!
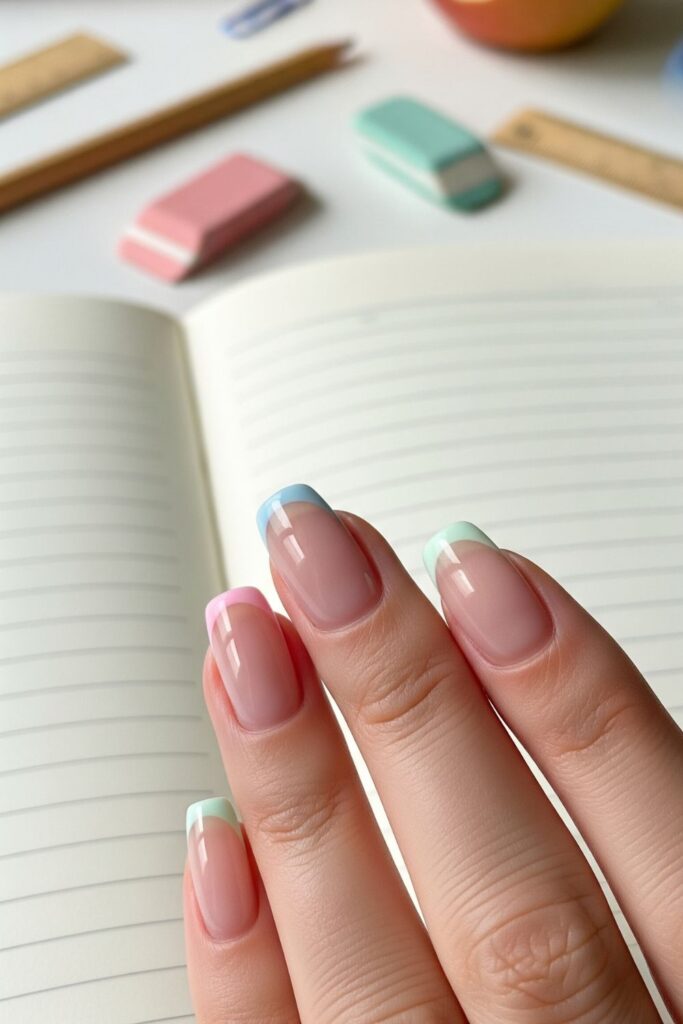
15. Micro French Tip Nails
These nails are the ultimate mix of classic and modern. The slim tip keeps it classy for school, while the subtle color twist makes it stand out. I love how they’re clean, elegant, and go with every outfit perfect for keeping things cute without going overboard.
How to DIY:
- Nails should be trimmed and filed to a short round or square shape.
- A base coat must be applied and dried.
- A sheer nude or pale pink polish should be painted and allowed to dry.
- Using a striping brush, thin lines should be drawn across the tips in the color of choice.
- A glossy top coat must be added to finish.
Tools Needed:
- Nail file
- Base coat
- Nude/pink polish
- Striping brush
- Colored polish (blue, white, or pastel)
- Top coat
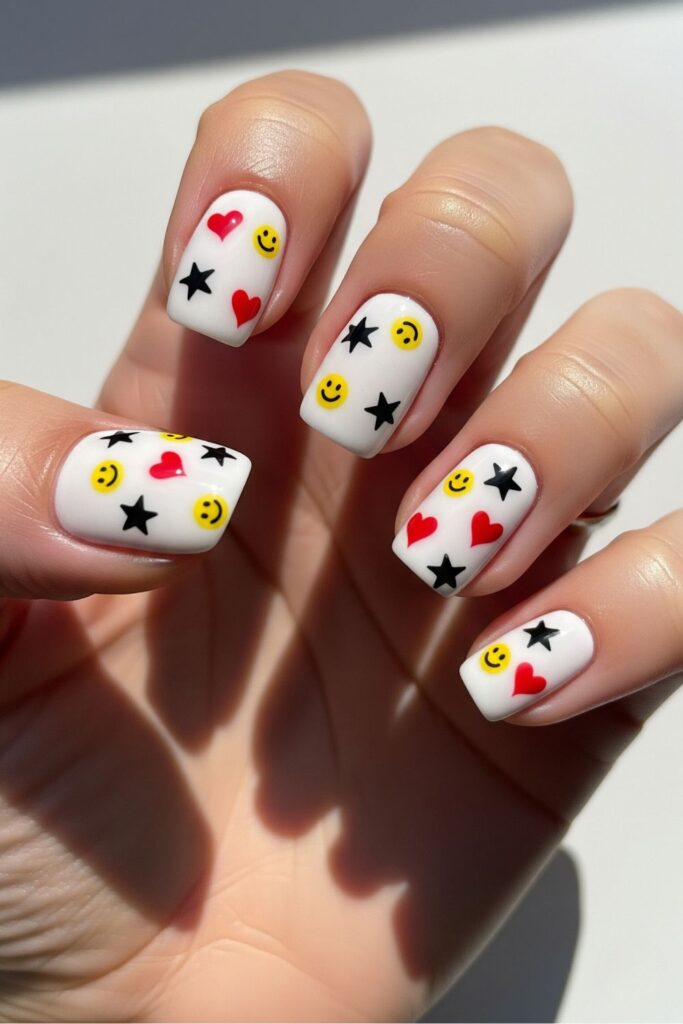
14. Doodle Art Nails
These nails look like tiny notebook doodles think smiley faces, hearts, and stars. They feel super nostalgic and playful. I love that they reflect the fun of school life while still being wearable and creative.
How to DIY:
- Nails should be shaped and cleaned thoroughly.
- A white or pale pink base coat should be applied and dried.
- Small doodles can be drawn using a fine nail art pen or thin brush with black polish.
- Each nail should feature a different symbol.
- A matte top coat should be used to seal in the art.
Tools Needed:
- Nail brush
- Base coat
- White or pale pink polish
- Nail art pen/black polish
- Matte top coat
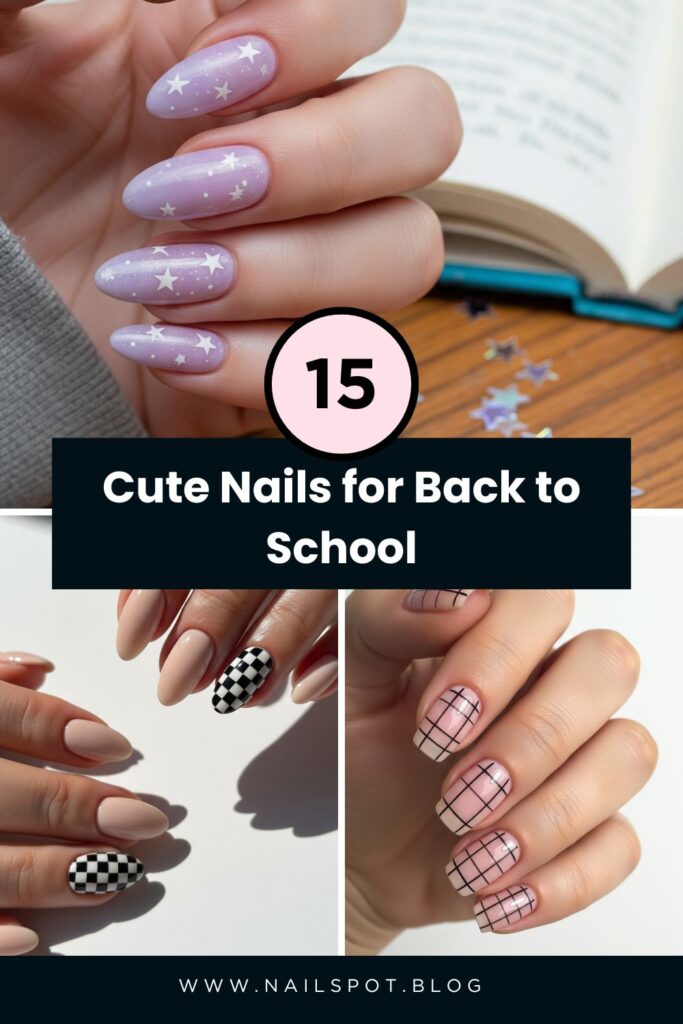
13. Checkerboard Accent Nails
Checkerboard nails bring that cool-skater vibe to class. Adding it as an accent nail keeps it subtle but trendy. I like how it adds an edge without being too bold for school.

How to DIY:
- Nails should be prepped and filed.
- A nude or pastel base should be applied to all nails.
- One or two accent nails should be chosen.
- A checker pattern must be painted using a detail brush in white and black or a fun color combo.
- Top coat should be applied to all nails.
Tools Needed:
- Fine brush or checkerboard nail sticker
- Base polish
- Black & white polish
- Top coat
12. Pencil Tip Nails
These nails literally look like the tips of pencils perfect for school! They’re playful and creative without being too flashy. I love that they’re super thematic and guaranteed to get compliments.

How to DIY:
- Nails should be filed into a slight point.
- Yellow polish must be used as the base and dried.
- The tip should be painted nude (for the wood) and then outlined in black.
- A silver band and pink “eraser” should be added at the base of the nail.
- Top coat should be applied to finish.
Tools Needed:
- Nail file
- Yellow, nude, black, silver, and pink polish
- Fine nail art brush
- Top coat
You can find other articles related to back to school
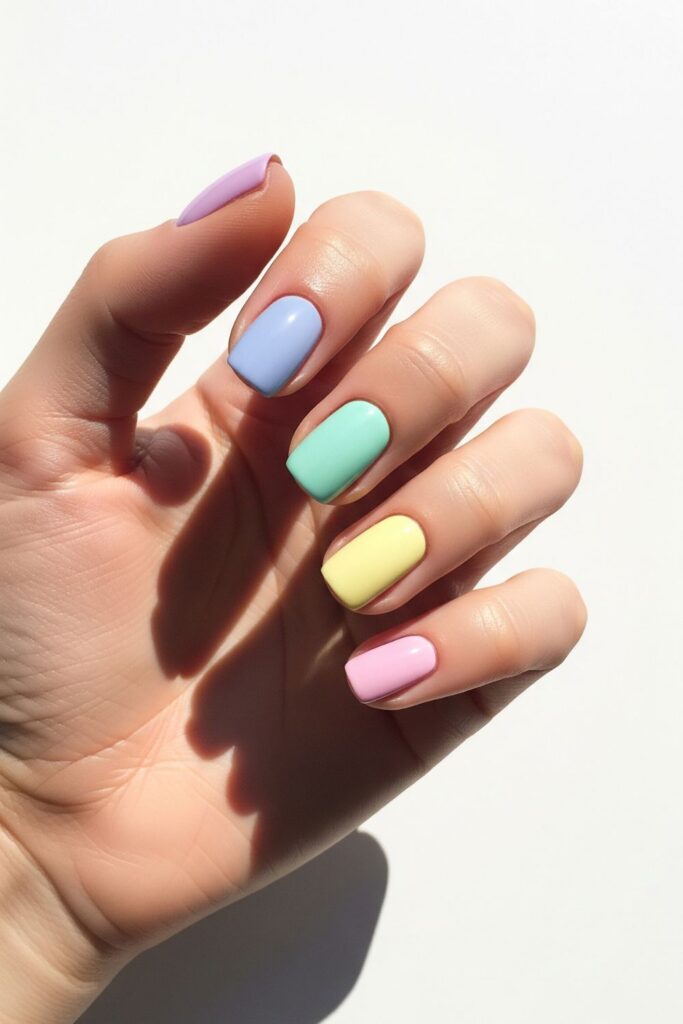
11. Pastel Mix-and-Match Nails
These nails are all about softness and personality. Each nail has a different pastel shade, which makes them fun and eye-catching while staying school-appropriate. I like how simple yet cheerful they are perfect for any outfit.
How to DIY:
- Nails should be filed and prepped.
- One pastel shade should be painted on each nail (lavender, mint, peach, baby blue, etc).
- Two coats must be applied for opacity.
- A clear top coat should be added for shine.
Tools Needed:
- 5 pastel polishes
- Base coat
- Top coat
10. Color Block Tip Nails
This design puts a modern twist on French tips by adding bold color blocks instead of traditional curves. I love how stylish and creative they look without breaking school rules — super cute and customizable with your favorite shades.

How to DIY:
- Nails should be filed and cleaned.
- A nude or neutral base coat should be applied.
- At the tip of each nail, two angled color blocks should be painted with a fine brush.
- Clean edges must be created using nail tape or carefully with a steady hand.
- A top coat should be added.
Tools Needed:
- Nude polish
- 2–3 bright colored polishes
- Nail art tape or fine brush
- Top coat
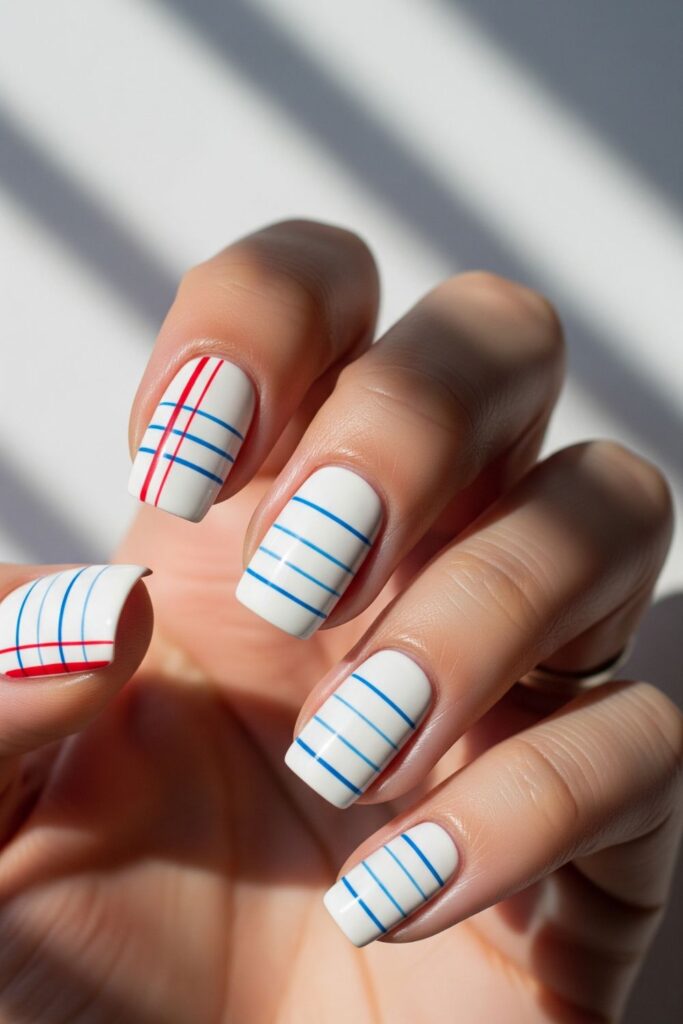
9. Notebook Paper Nails
These nails mimic the look of classic lined paper white with blue lines and a red margin. It’s so fun and nostalgic, perfect for back to school! I like how quirky and detailed they are while still being wearable.
How to DIY:
- A white base coat should be applied and dried.
- Thin blue horizontal lines and a vertical red line should be drawn with a nail art pen.
- Optional: Add a mini “A+” or doodle.
- A glossy top coat must be applied.
Tools Needed:
- White polish
- Blue and red nail art pens
- Base coat
- Top coat
8. Smiley Face Accent Nails
Smiley faces make everything more cheerful! Adding one to an accent nail brings a fun, happy vibe to your look. I love how these cute nails make you smile and totally match the back to school spirit.

How to DIY:
- A neutral base coat should be painted and dried.
- On one or two nails, small yellow circles should be painted using a dotting tool.
- Black polish or a nail pen should be used to draw eyes and a smile.
- All nails should be sealed with top coat.
Tools Needed:
- Base coat
- Neutral polish
- Yellow and black polish
- Dotting tool
- Top coat
You can find other articles related to back to school
7. Grid Nails
Grid nails give that clean, planner-vibe look — like mini bullet journal pages! They’re subtle yet graphic, and I love how they feel polished without being too loud. They pair great with uniforms or simple school outfits.

How to DIY:
- Nails should be painted with a light pink or beige base.
- A fine brush or nail art pen should be used to draw thin black or white grid lines.
- Two coats of top coat should be applied for a smooth finish.
Tools Needed:
- Base coat
- Light polish (nude or pink)
- Nail art pen or striping brush
- Top coat
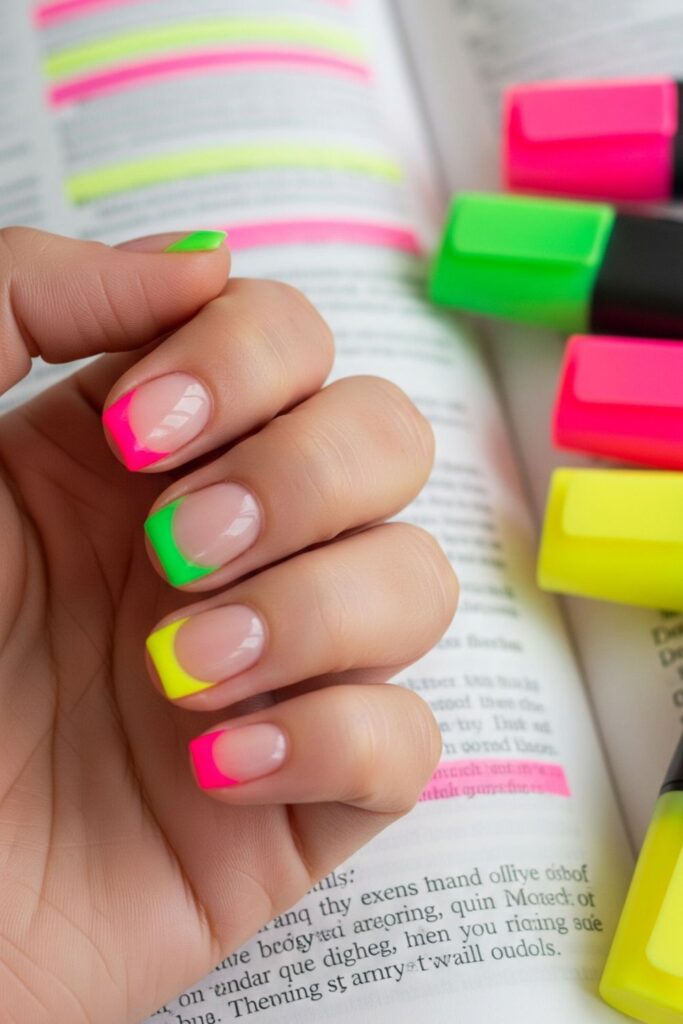
6. Highlighter Neon Tip Nails
Bright neon tips mimic your favorite highlighters fun and bold without being too much. I love the pop of color it gives while keeping the base neutral and school-ready.
How to DIY:
- Nails should be shaped and buffed.
- A sheer nude base should be painted and dried.
- Neon colors like pink, green, or yellow should be applied to the tips with a striping brush.
- A glossy top coat must be added.
Tools Needed:
- Nude base polish
- Neon yellow/pink/green polishes
- Striping brush
- Top coat
5. Starry Skies Nails
These nails feel dreamy and calm soft blue or lavender bases topped with tiny stars. They remind me of late-night study sessions and make everything feel magical. So cute and calming for busy school days!
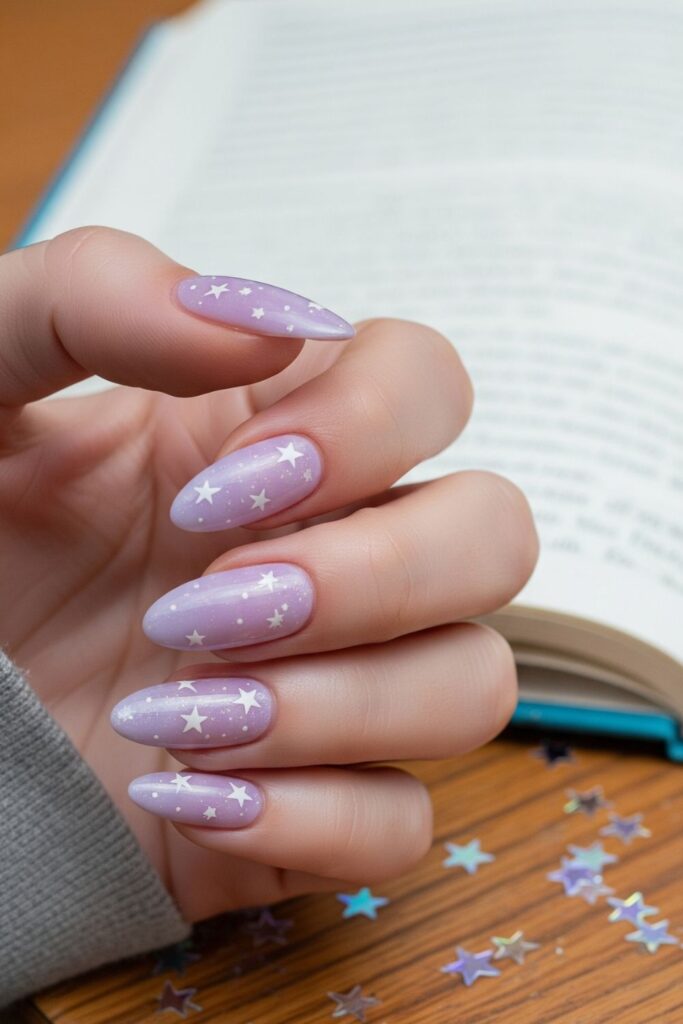
How to DIY:
- A soft pastel base should be applied and dried.
- Small stars should be painted or added as stickers.
- Glitter or shimmer top coat can be added for sparkle.
- Seal with glossy top coat.
Tools Needed:
- Pastel polish
- Star nail stickers or white polish
- Glitter top coat (optional)
- Clear top coat
4. Minimalist Black Lines Nails
Simple black lines look super chic and artsy. These minimalist nails are subtle enough for school but still stylish and modern. I love how they match everything and never feel overdone.

How to DIY:
- A nude or sheer base should be applied.
- One thin line or geometric shape should be painted using black polish and a striping brush.
- Optional: Add a dot or second line.
- Top coat should be applied to finish.
Tools Needed:
- Base coat
- Nude polish
- Black polish
- Striping brush
- Top coat
3. Polka Dot Party Nails
Polka dots are timeless and fun. Whether pastel or bold, they always add charm to your nails. I like how you can customize them to your color palette and make them match your backpack or planner.
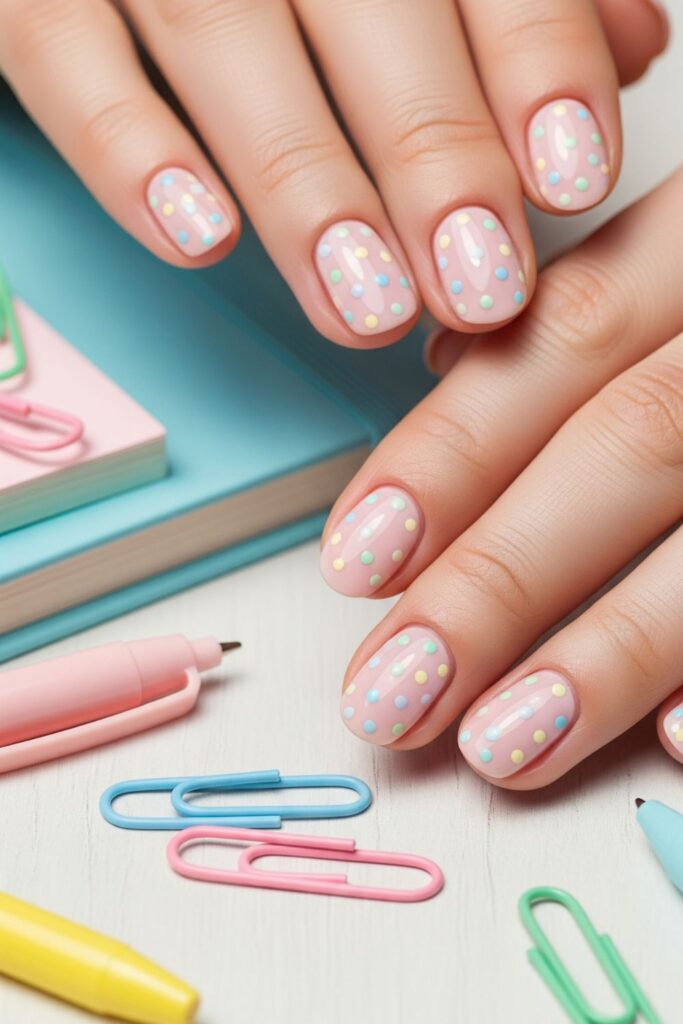
How to DIY:
- A light base should be painted and dried.
- Using a dotting tool, tiny dots should be added across the nails in multiple colors.
- A clear top coat should be used to lock it all in.
Tools Needed:
- Light polish
- Dotting tool or toothpick
- Colorful polishes
- Top coat
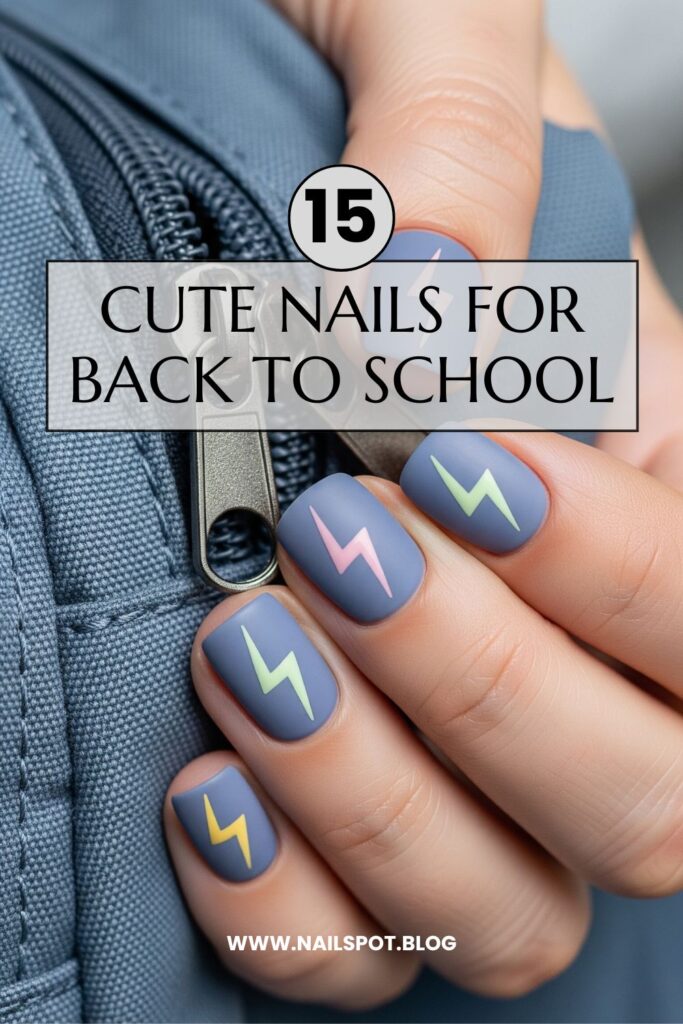
2. Pastel Lightning Bolts Nails
Lightning bolt accents are perfect for adding a spark of energy. Using pastel instead of neon keeps it school-appropriate while still bold and fun. I like how it gives you confidence and creativity vibes.

How to DIY:
- A soft pastel polish should be applied as the base.
- A thin nail art brush should be used to paint lightning bolts in a contrasting color.
- One bolt per nail or just on accent nails can be chosen.
- A glossy top coat should be added.
Tools Needed:
- Base polish
- Contrasting pastel polish
- Nail art brush
- Top coat
1. Clear Nails with Mini Icons
Clear-based nails with small icons like hearts, books, or paperclips are so fun and creative! I love how the clear base keeps it minimal while the art adds a personalized back to school touch.

How to DIY:
- Nails should be prepped and a clear base coat applied.
- Tiny icons can be drawn using stickers or a fine brush.
- Choose school themes: books, hearts, pencils.
- Add top coat to protect the design.
Tools Needed:
- Clear polish
- Nail stickers or thin brush
- Icon-colored polishes
- Top coat