
Some of the links in this post might be affiliate links. This means that if you click on the link and make a purchase, I’ll receive a small commission – at no extra cost for you, which helps me cover the costs for this blog
As summer draws to a close, there’s still time to enjoy End of summer nails that bring out the season’s best colors and vibes. The warm sunsets, sparkling water, and blooming florals can inspire stunning End of summer nails designs. These End of summer nails ideas let you hold onto the sunshine a little longer, whether you’re savoring your last beach weekend or enjoying an outdoor dinner. Bright, fresh, and a little playful these styles will have you feeling summer-ready until the very end.

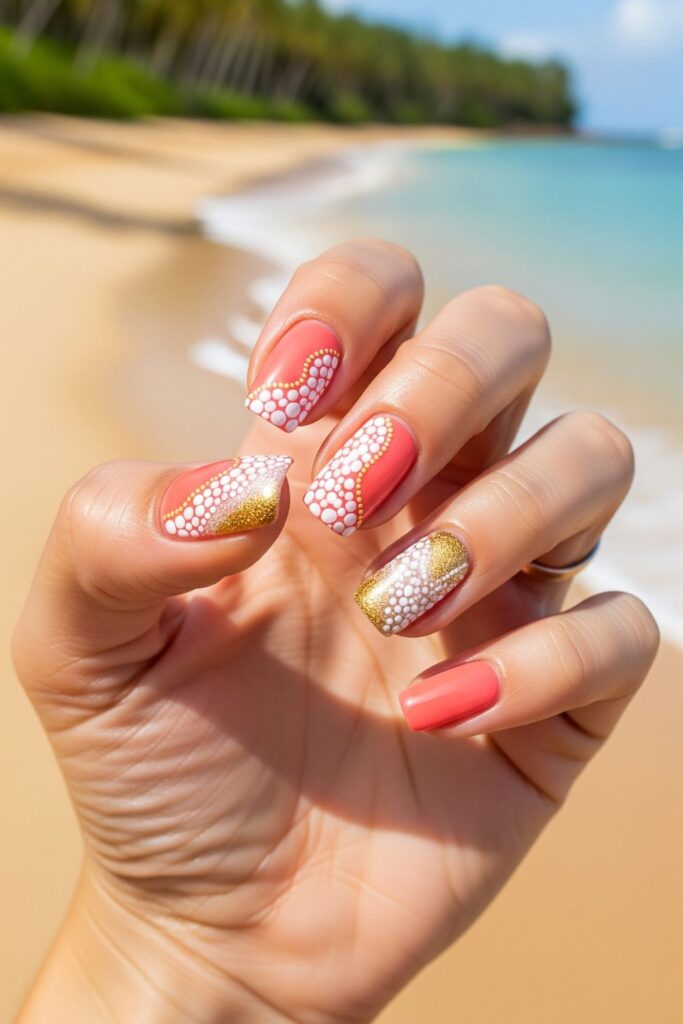
10. Coral Reef Nails
Inspired by the ocean’s colorful coral, this design features soft coral pinks accented with tiny white and gold details. I love it because it feels tropical without being too bold, perfect for End of summer nails ideas. It’s a cheerful reminder of summer beach days and pairs beautifully with light, airy outfits for the season’s final warm weeks.
DIY – Step by Step
- Nails are filed and cleaned.
- A soft coral pink polish is applied as the base.
- Small white and gold dots are added randomly using a dotting tool.
- Optional: add fine gold glitter on one accent nail.
- Sealed with a glossy top coat.
Tools Needed
- Nail file & buffer
- Base coat & top coat
- Coral pink polish
- White and gold polish
- Dotting tool
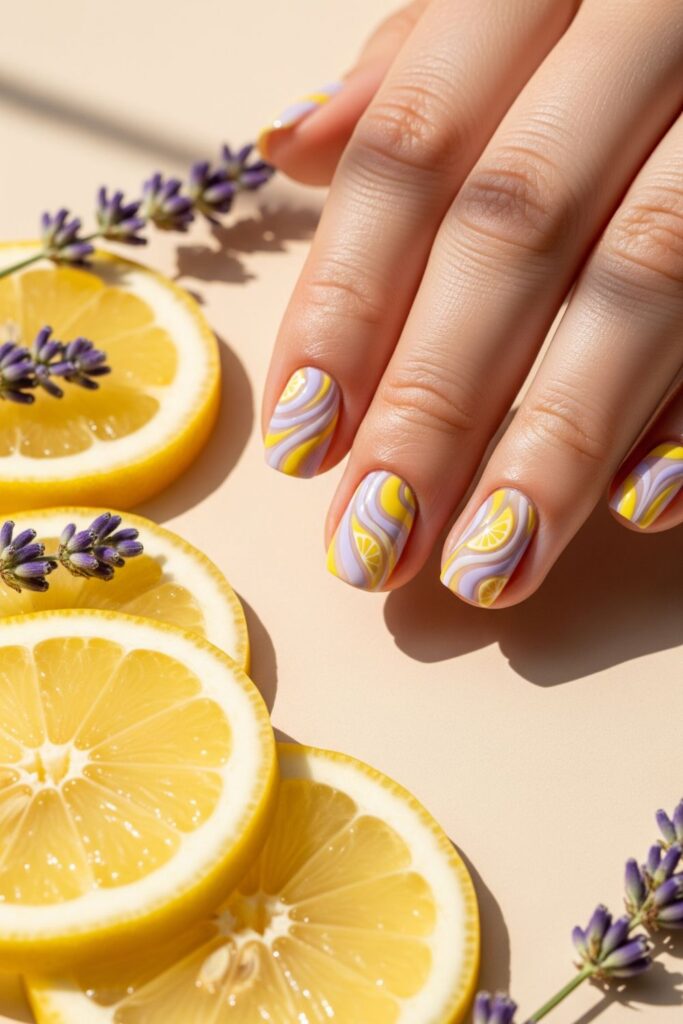
9. Lavender & Lemon Swirl Nails
This design combines pastel lavender and sunny lemon yellow in smooth swirls. I like it because it’s soft yet vibrant, perfect for End of summer nails designs that transition into early fall. The swirl pattern feels playful and unique, making it a great choice for anyone wanting a refreshing change from florals or glitter this season.
DIY – Step by Step
- Nails are shaped and prepped.
- A nude base coat is applied.
- Thin swirls of lavender and lemon polish are painted using a fine nail brush.
- Each nail has a slightly different swirl design for variety.
- Sealed with a glossy top coat.
Tools Needed
- Nail file & buffer
- Base coat & top coat
- Nude polish
- Lavender polish
- Lemon yellow polish
- Fine nail brush
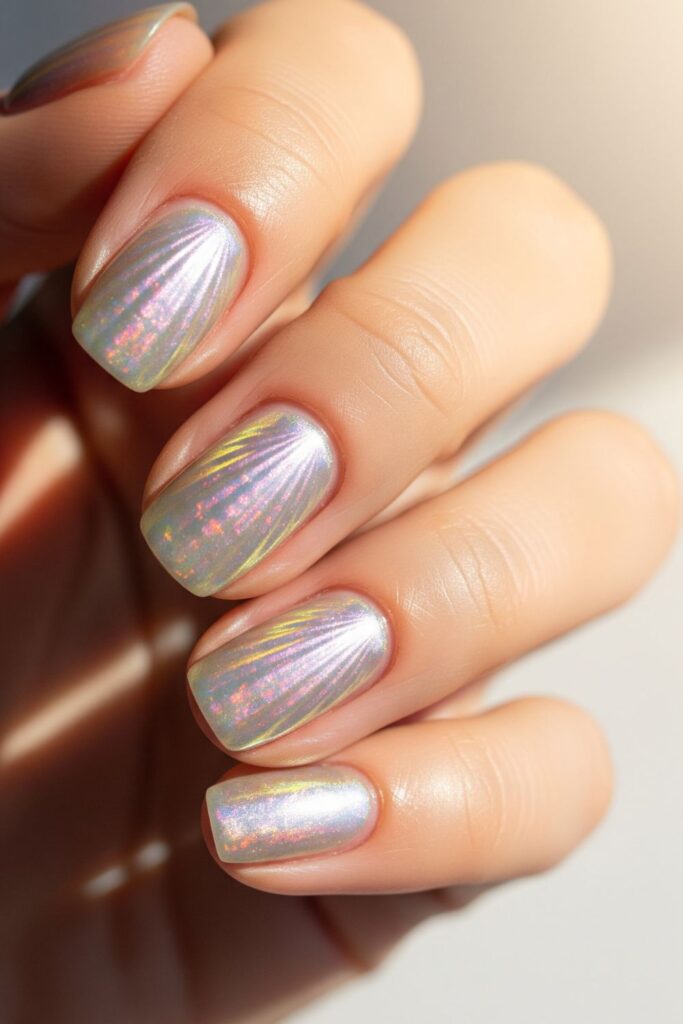
8. Seashell Pearl Nails
These nails shimmer with an iridescent pearly finish and delicate seashell-inspired ridges. I love how they feel elegant yet beachy, making them perfect for End of summer nails ideas. They capture that last seaside escape of the season, adding a soft glow to any look while being subtle enough for everyday wear.
DIY – Step by Step
- Nails are shaped and buffed smooth.
- A sheer pearly white polish is applied.
- A thin striping brush is used to paint subtle shell-like vertical lines.
- Optional: add tiny pearl studs on one accent nail.
- Finished with a glossy top coat.
Tools Needed
- Nail file & buffer
- Base coat & top coat
- Sheer pearly white polish
- Thin striping brush
- Small pearl studs (optional)
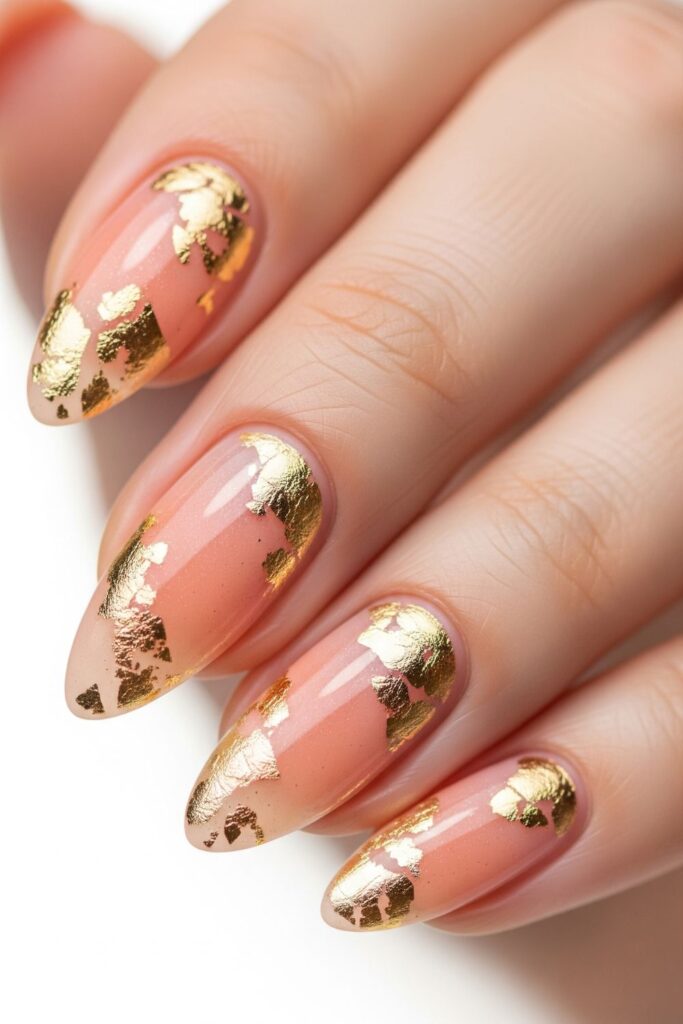
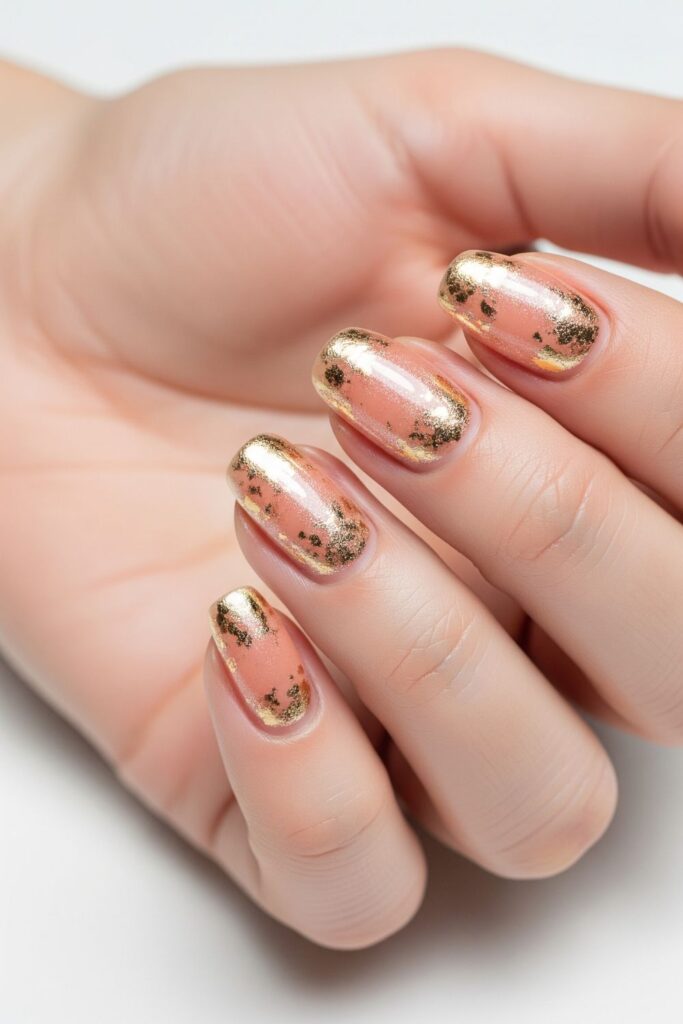
7. Peach Sorbet Nails
Soft peach tones with a subtle shimmer make this design light and refreshing, just like a frozen sorbet on a warm afternoon. I love it because it’s understated yet cheerful, making it one of my favorite End of summer nails designs. It complements both casual and dressy outfits while giving off a fresh, juicy summer vibe.
DIY – Step by Step
- Nails are filed and shaped.
- A sheer peach polish is applied as the base.
- A fine shimmer top coat is added for sparkle.
- Optional: one accent nail can have gold foil near the cuticle.
- Sealed with a glossy top coat.
Tools Needed
- Nail file & buffer
- Base coat & top coat
- Sheer peach polish
- Fine shimmer polish
- Gold foil (optional)
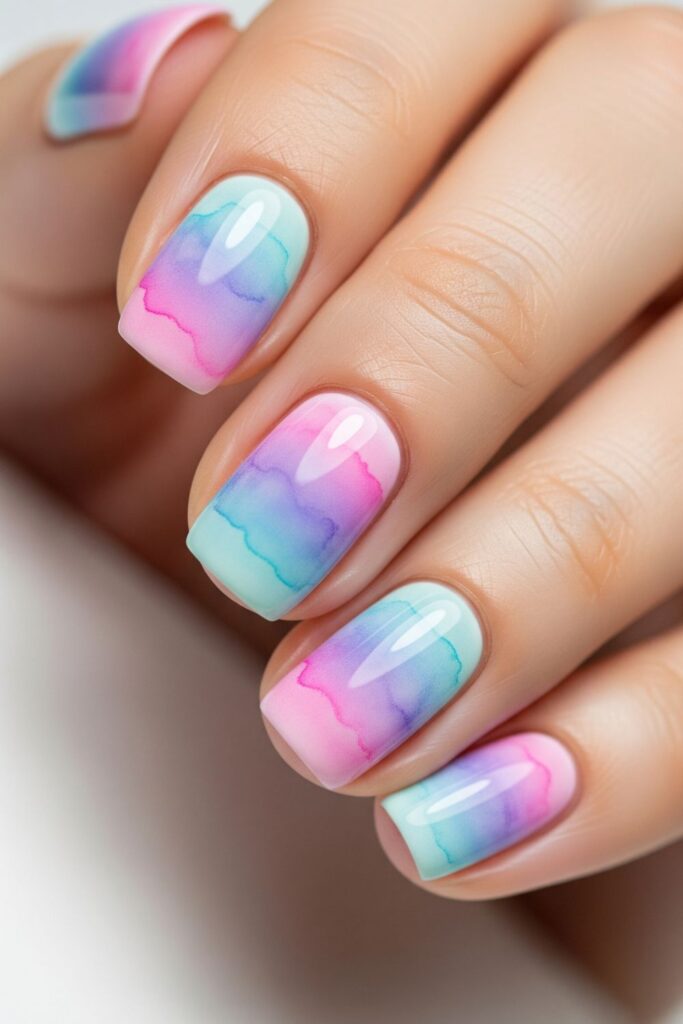
6. Watercolor Sunset Nails
This dreamy design blends pink, purple, and soft blue in a watercolor effect, resembling the sky just before night falls. I love it because it’s artistic and unique, perfect for End of summer nails ideas. It feels romantic and breezy, making it an eye-catching choice for the last picnics, parties, or evening walks of the season.
DIY – Step by Step
- Nails are cleaned and shaped.
- A white polish is applied as the base.
- Small dabs of pink, purple, and blue polish are applied with a sponge.
- Colors are blended softly for a watercolor effect.
- Finished with a glossy top coat.
Tools Needed
- Nail file & buffer
- Base coat & top coat
- White polish
- Pink, purple, and blue polish
- Makeup sponge
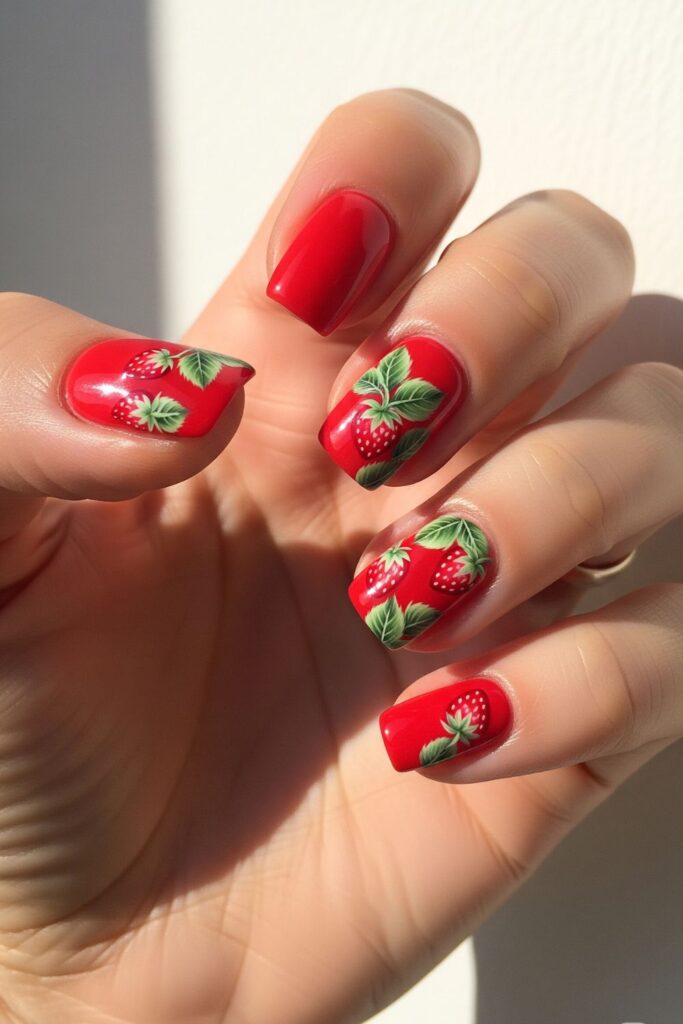
5. Strawberry Fields Nails
Bright red nails with tiny strawberry details feel playful and summery. I love this design because it’s sweet, cheerful, and perfect for End of summer nails designs. The combination of juicy reds and green leaf accents makes it ideal for casual outings, picnics, or any moment you want to add a pop of fruit-inspired fun to your look.
DIY – Step by Step
- Nails are shaped and prepped.
- A bright red polish is applied as the base.
- Tiny green leaves and white seeds are painted using a fine nail brush.
- One or two nails can feature a full strawberry illustration.
- Sealed with a glossy top coat.
Tools Needed
- Nail file & buffer
- Base coat & top coat
- Bright red polish
- Green polish
- White polish
- Fine nail brush
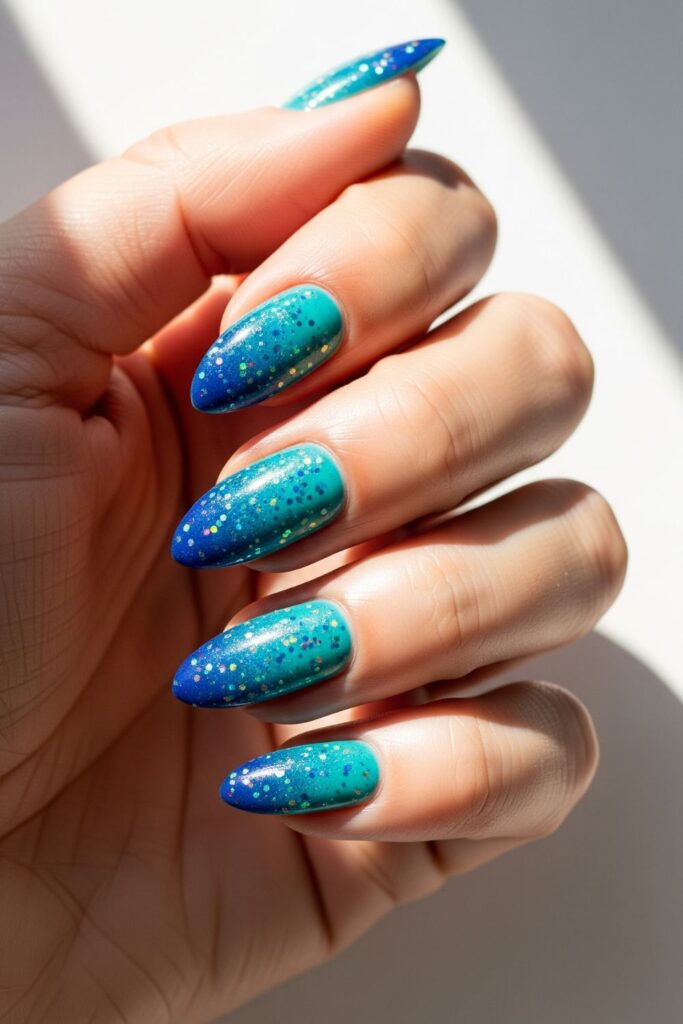
4. Mermaid Lagoon Nails
This design sparkles with ocean blues, teals, and hints of holographic glitter, resembling sunlight hitting the waves. I love it because it feels magical and adventurous, perfect for End of summer nails ideas. It’s like carrying a piece of the sea on your fingertips, making it ideal for one last beach trip or poolside relaxation.
DIY – Step by Step
- Nails are cleaned and filed.
- A gradient of blue and teal polish is sponged on.
- A layer of holographic glitter polish is added.
- Edges are cleaned for a neat look.
- Finished with a glossy top coat.
Tools Needed
- Nail file & buffer
- Base coat & top coat
- Blue and teal polish
- Holographic glitter polish
- Makeup sponge
3. Sunflower Charm Nails
Golden yellow sunflowers on a pale sky-blue base bring the feeling of a sunny field right to your nails. I love this style because it’s cheerful and warm, perfect for End of summer nails designs. It’s a great way to hold onto sunny vibes as the season changes, making every day feel a little brighter.
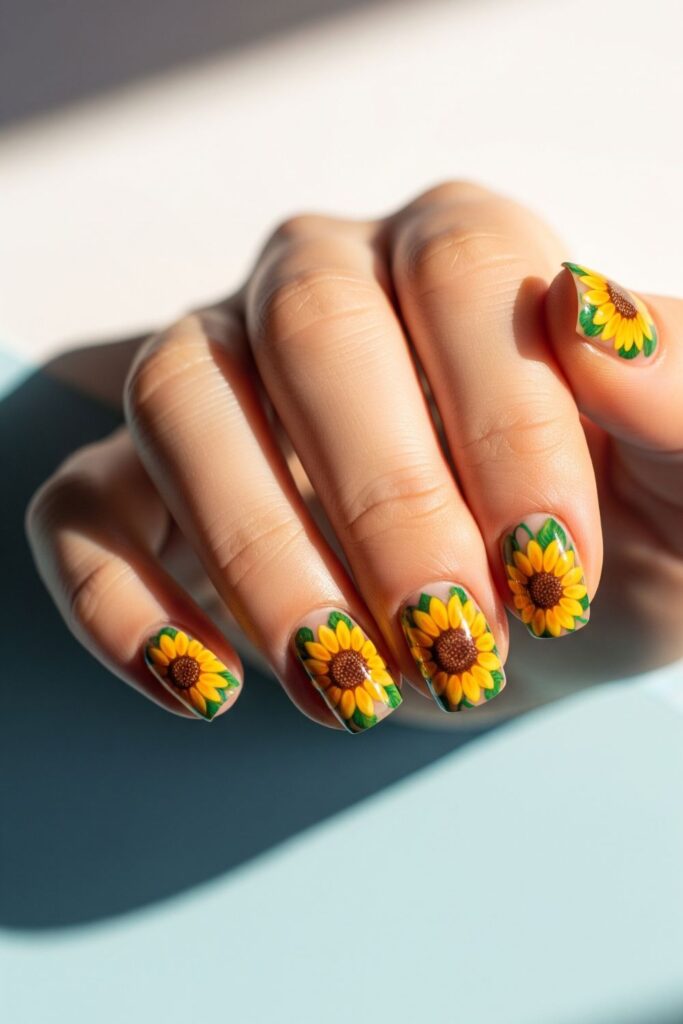
DIY – Step by Step
- Nails are shaped and prepped.
- A pale blue polish is applied as the base.
- Yellow petals are painted using a dotting tool or fine brush.
- Brown or black centers are added to each sunflower.
- Finished with a glossy top coat.
Tools Needed
- Nail file & buffer
- Base coat & top coat
- Pale blue polish
- Yellow and brown/black polish
- Dotting tool or fine nail brush
2. Mint Mojito Nails
Fresh mint green nails with tiny lime slice accents bring cool cocktail vibes to your fingertips. I love it because it’s refreshing and playful, perfect for End of summer nails ideas. This design is both fun for a beach day and chic enough for evening events, keeping your summer style crisp and lively until the last warm night.
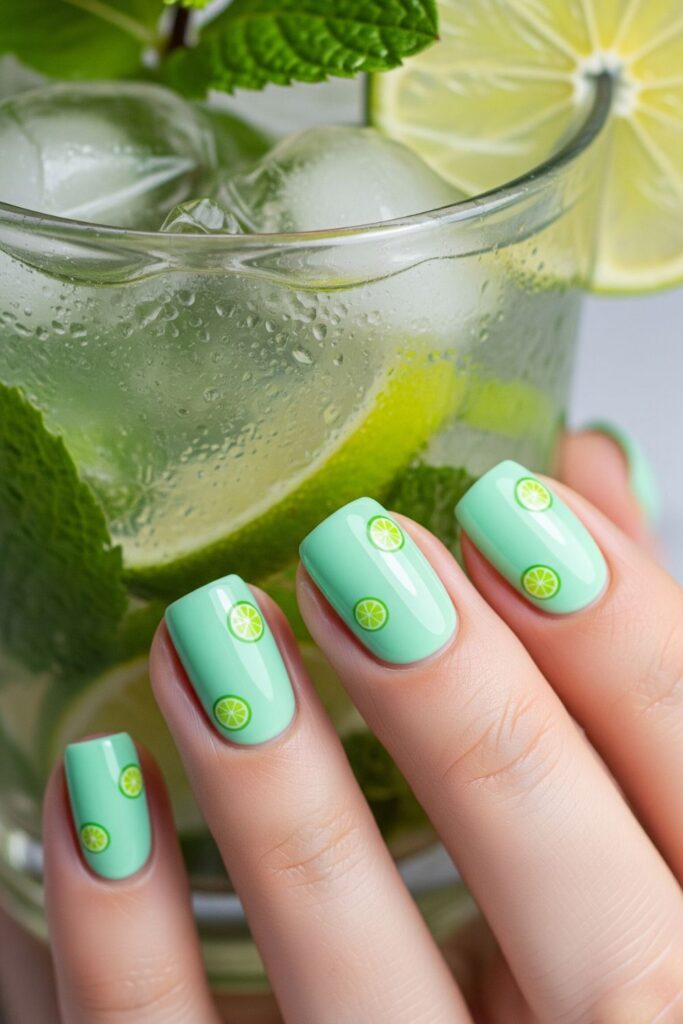
DIY – Step by Step
- Nails are cleaned and shaped.
- Mint green polish is applied as the base.
- Tiny lime slice patterns are added with green and white polish.
- Optional: add a small gold foil detail for sparkle.
- Sealed with a glossy top coat.
Tools Needed
- Nail file & buffer
- Base coat & top coat
- Mint green polish
- Green and white polish
- Fine nail brush
1. Coral & Gold Wave Nails
This design features bold coral polish with delicate gold wave lines, inspired by the shimmering ocean at sunset. I love it because it’s elegant and vibrant, making it one of the most striking End of summer nails designs. The gold accents give it a luxurious touch, while the coral base keeps it fresh and fun.
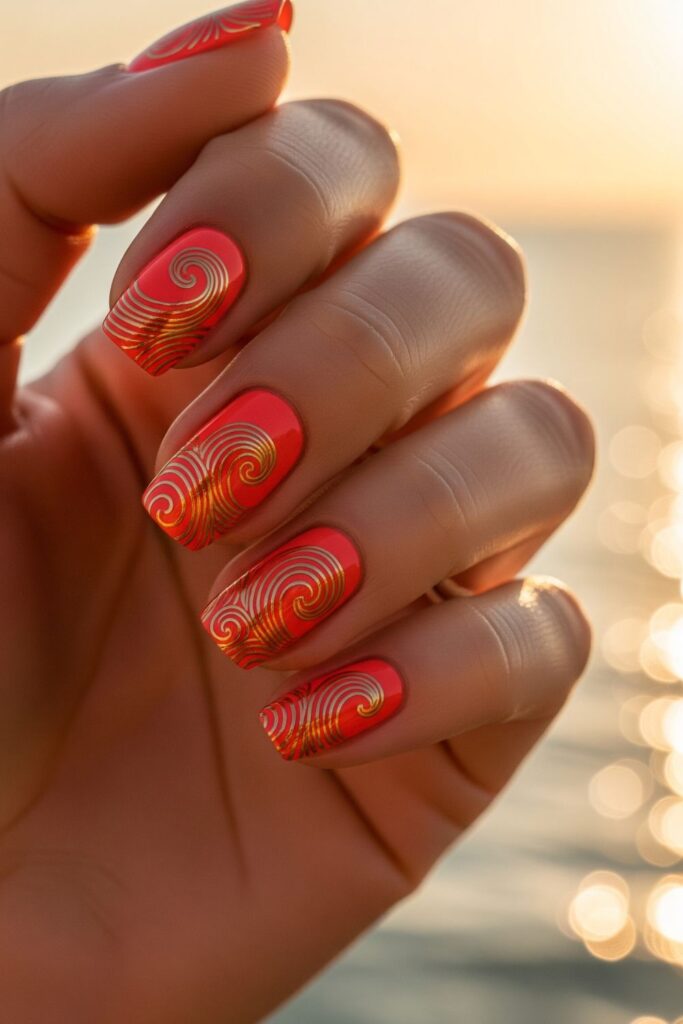
DIY – Step by Step
- Nails are filed and prepped.
- Coral polish is applied as the base.
- Gold metallic polish is painted in soft wave shapes using a thin brush.
- Lines are kept fine for a delicate look.
- Finished with a glossy top coat.
Tools Needed
- Nail file & buffer
- Base coat & top coat
- Coral polish
- Gold metallic polish
- Thin nail art brush